
I)Introduction
In part One, the fundamentals and theory behind network configuration were covered. In part two, these theories will get put to use. This section will demonstrate the structure of switching within VMWare and Proxmox then configure them to form a usable network.
Having local or KVM access to these systems is recommended in case of a configuration error that needs rolled back, especially if it involves the management interface(s.)
Switching is varied, so this documentation will not cover it other than to say what needs to be done on the other side.
II)What Does the Switching Configuration Look Like?
Proxmox VE configures exactly like any Debian Linux Networking. Proxmox can be configured with CLI or GUI start to end.
To configure a network, what it looks like needs to be determined first. As per part I, three critical questions need to be answered:
- Are multiple links required?
- Will LACP be used for those links? If not what redundancy mode?
- Will the interface(s) be used for multiple VLANs or a single VLAN?
III)Configuring the Bond
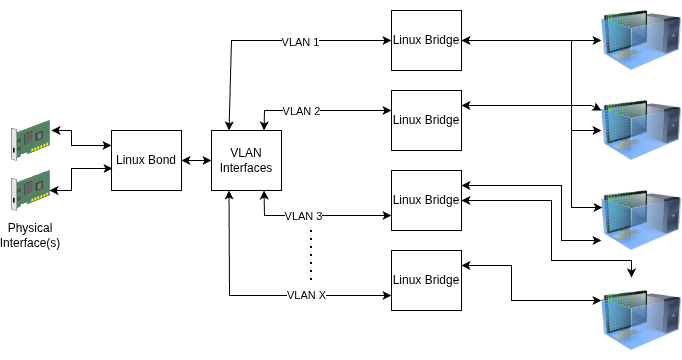
The first step is to configure the bond, if one is going to be used. A bond can be used with a single link
and future proofs adding links later on. If no bond is desired, this step can be skipped and the interfaces used instead.
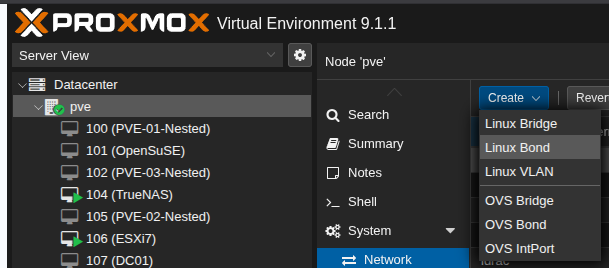
Open Proxmox VE, expand the options on the left pane then go into the server. Go to the Network sub menu, then from the drop down select “Linux Bond.”
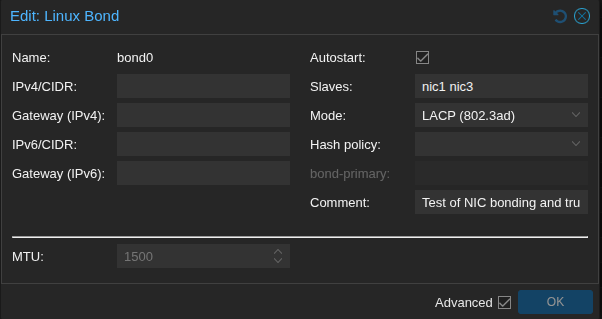
Within the bond add the interface(s) desired for uplink(s) to the slaves box space separated. Do not add IPs to the bond. Make sure it the autostart box is enabled. The mode will vary here. In this case LACP is used. Here is a table from This Red Hat Document Explaining what each mode means.
| Bonding mode | Configuration on the switch |
|---|---|
0 – balance-rr | Requires static EtherChannel enabled, not Link Aggregation Control Protocol (LACP)-negotiated. |
1 – active-backup | No configuration required on the switch. |
2 – balance-xor | Requires static EtherChannel enabled, not LACP-negotiated. |
3 – broadcast | Requires static EtherChannel enabled, not LACP-negotiated. |
4 – 802.3ad | Requires LACP-negotiated EtherChannel enabled. |
5 – balance-tlb | No configuration required on the switch. |
6 – balance-alb | No configuration required on the switch. |
Looking on the Internet, it’s plausible to probable that the term Etherchannel is used loosely here. Testing confirms that modes 0, 2, and 3 do not use LACP and that LACP enabled ports will not enable on a Cisco Catalyst Switch in these modes.
For most people use of LACP with mode 4 should work fine if a single switch (or an mLAG configuration) is being used. For people running a network that has multiple switches and no way to run mLAGs across them, modes 1, 5, and 6 should work. Mode 5 balances based off transmission only, while mode 6 is a hybrid of transmission and receive load balancing. There may be performance implications to this. In general I would advise doing active-backup or sticking with LACP. As a reminder, LACP does not provide bandwidth increases for single stream traffic. For more reading on the details of these modes, this Linux Foundation Documentation covers it in detail.
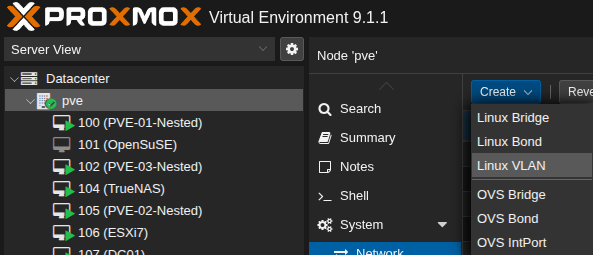
After the bond is set up, sub interfaces can be added if desired. To add a VLAN sub interface, go to the server, then go to Network, then go to Create. Select Linux VLAN.
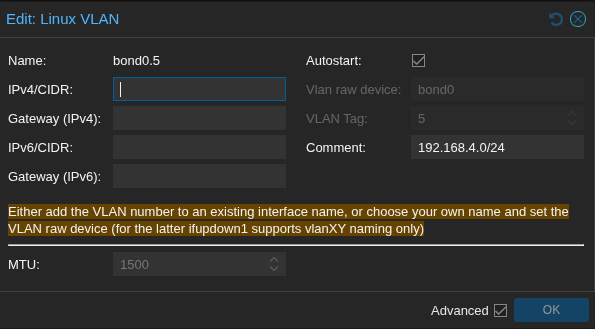
As an example VLAN 5 on bond0 would be bond0.5. Once again, do not configure an IP on these sub interfaces. All comments are optional.
Sidebar:Native VLANs
A native VLAN is the VLAN that untagged traffic gets sent to by default on a trunk.
By default it is VLAN 1 on most switches. This is considered poor security practice, as it tends to cause VLAN 1 to be a “catch all” VLAN and there is the potential for partially configured equipment to be exposed.
Switches may behave differently with native VLANs. As an example, setting a native VLAN on a Cisco Switch and then tagging traffic with that VLAN ID works fine. On Fortiswitch setting a native VLAN prevents traffic tagged with that VLAN from working. If in doubt talk to the network administrators and/or test to understand behaviors.
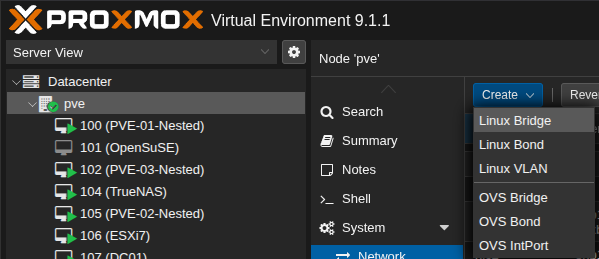
After VLANs are created, bridges are needed. Create a new bridge from the drop down menu.
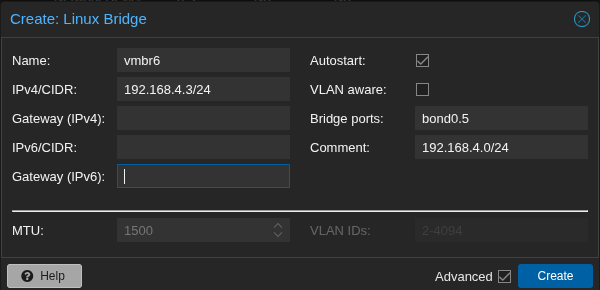
If an IP is desired on the host, this is where that IP isconfigured. This IP would allow the host to be managed from this subnet without a router or firewall in between.
VLAN aware lets multiple VLANs run on a single bridge. Scenarios this would be used involve running a trunk into a VM. This may be done for storage, virtualized hypervisors or other complex configurations. I prefer a simple philosophy of one bridge per VLAN, but that is personal preference.
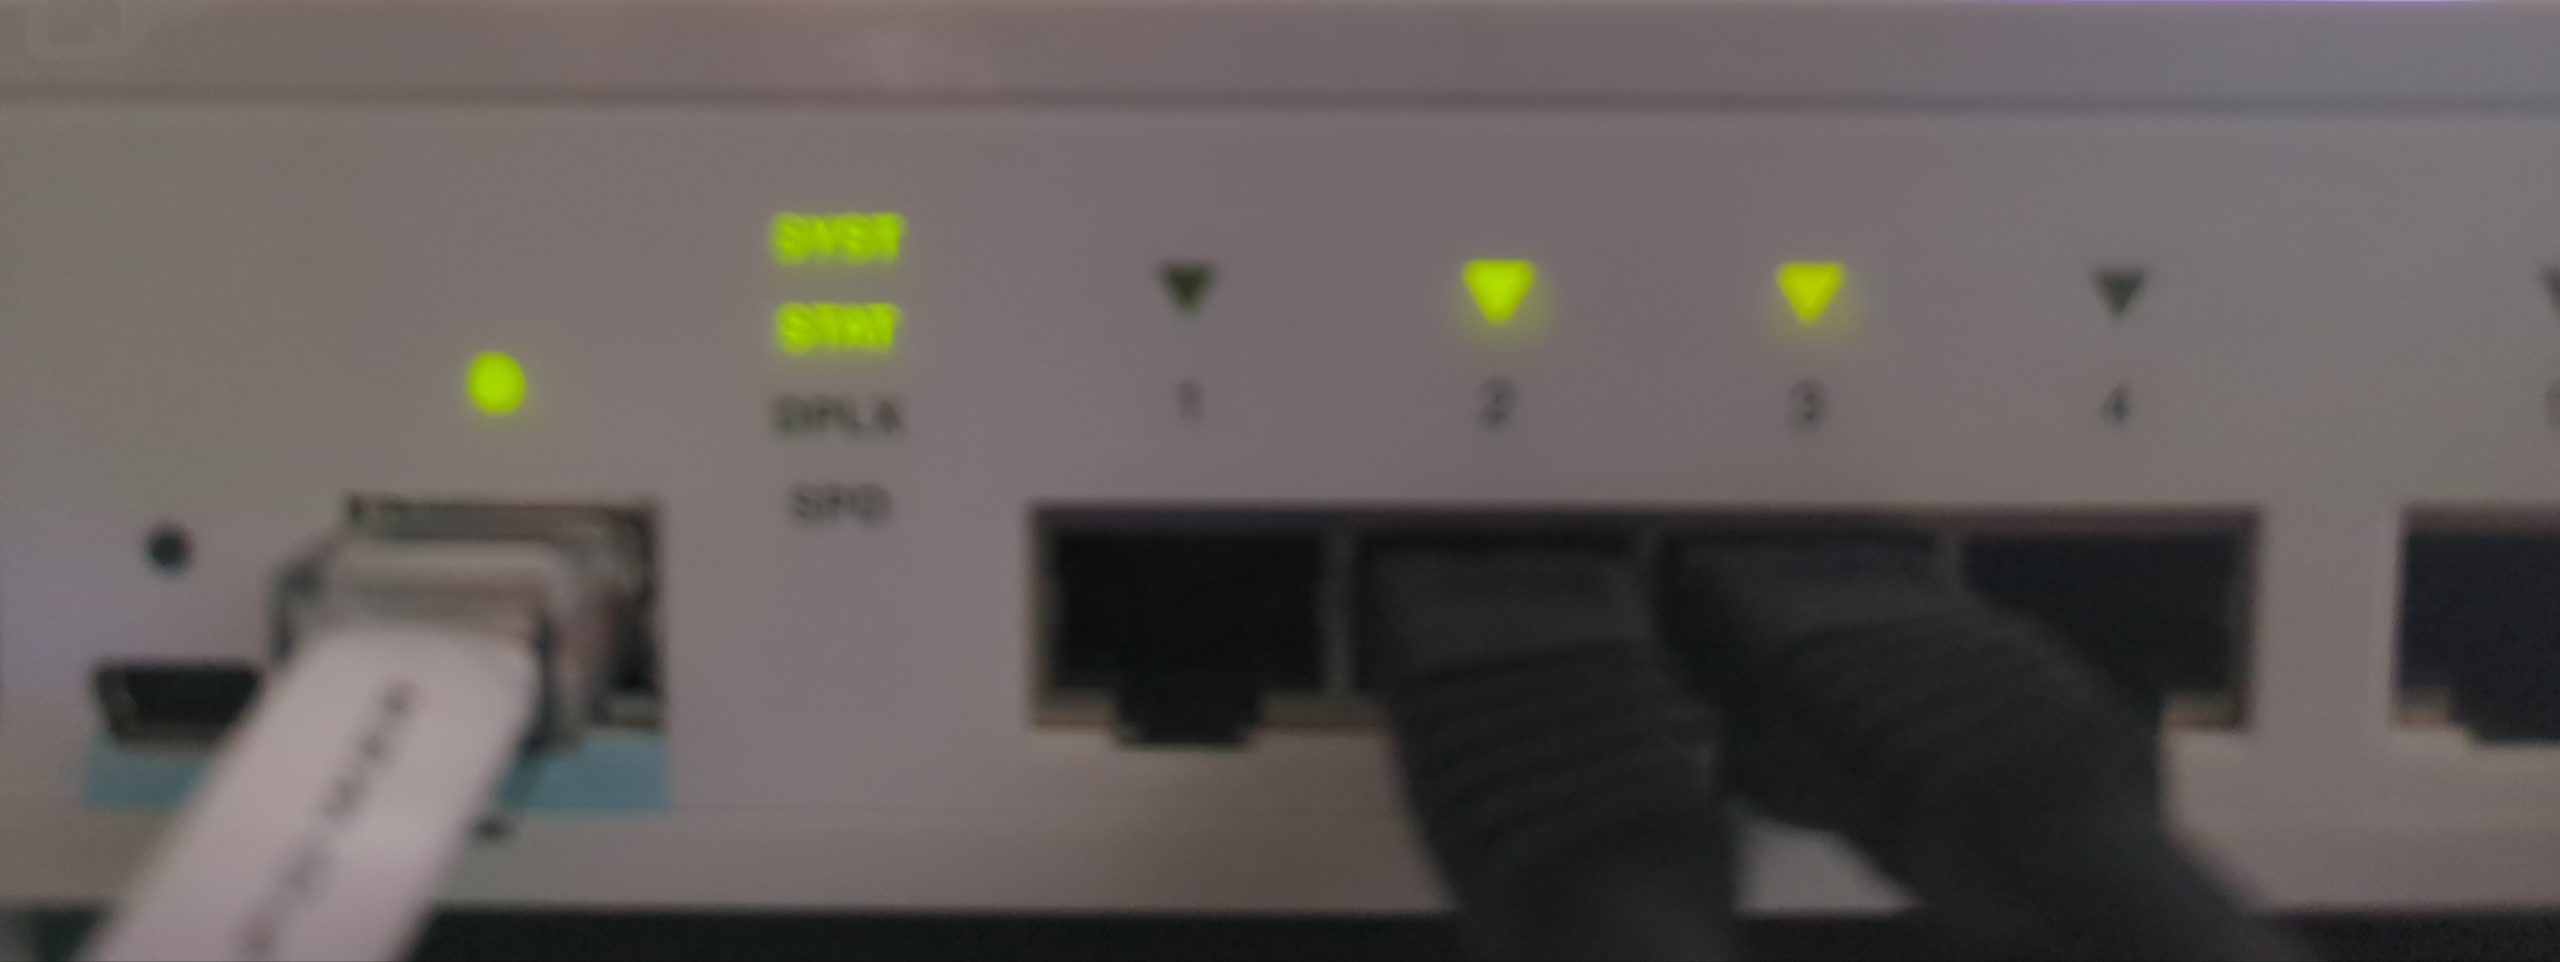
Multiple ports can be used on a bridge, however it is not required with a bonded configuration. I have not tested whether or not multiple NIC uplinks on a bridge will cause a switching loop and then cause Spanning Tree Protocol (STP) to kick in. If you see one port yellow and the other one green on your switch, this is likely the case. It is also plausible that this will cause link flapping.
Alternately, if traffic is within a single host, a bridge port is not required.

After these bonds, sub interfaces and bridges are added the configuration needs to be applied. This is done any time a networking change is made. No changes will work until this is done.
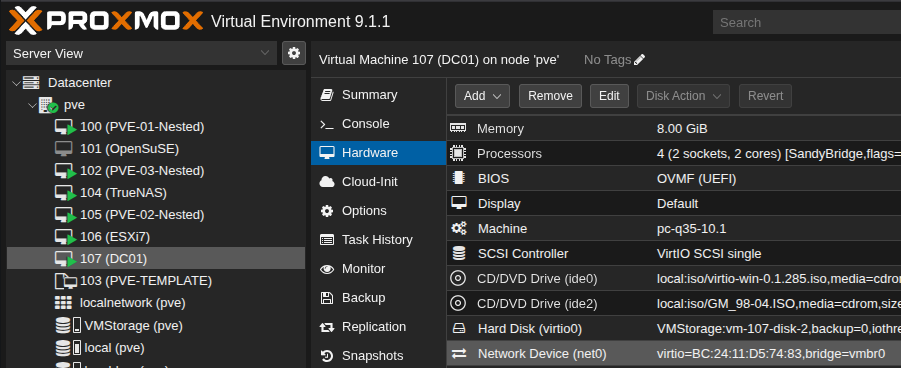
To add VMs to the bridge, go into the VM and go to the Hardware Settings. Edit the NIC or add a new one, then set the interface to the respective bridge.
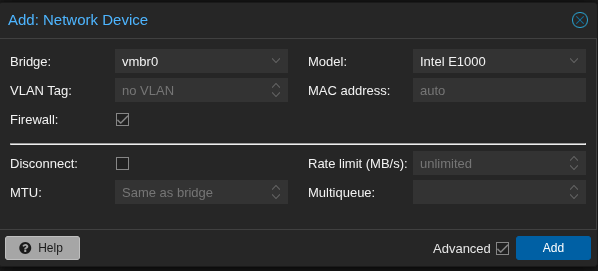
A new network device has a few options. Firewalling is available, although it’s out of the scope of this post. This can be disabled by Datacenter, by host, or by VM. Higher levels over ride lower levels. (as an example, if the Datacenter is disable you can not enable on the host.
Although there are multiple NIC models available, the best NIC to choose if possible will be VirtIO. The others should be used if compatibility is needed.
Manual assignment of MAC address is useful in cases such as systems that are licensed by MAC Address. In general this should not need to be changed.
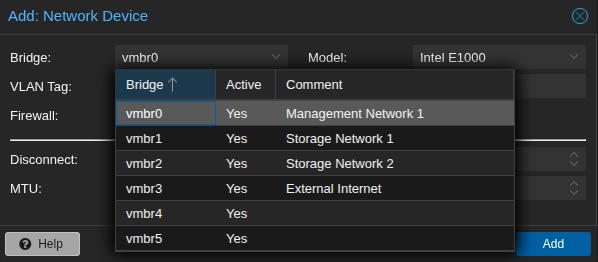
The comments show up when the bridge is dropped down. This is a nice touch in my opinion, it means that you’re not reliant on the naming to add metadata. The visible characters are about 25, so it’s not good for a novel but good enough to convey information.
IV)Conclusion
Although this looks and seems complicated, the concepts are similar to VMWare. The difference is in terminology and execution This is the minimal configuration I would want to apply in a production environment typically.
I really like that Proxmox offers the ability to provide comments instead of having to rely on the naming to convey the information.
An advantage that ESXi has over Proxmox is the visualization of the networks and if configured CDP/LLDP in the GUI. CDP and LLDP are both useable via CLI in Linux. This plug in says it integrates LLDP, but I haven’t tested it yet. I did install and run LLDP via the CLI and it works however. CDP/LLDP are great diagnostic tools, especially in an environment that’s poorly documented.